

Using Pre-configured Lists for Manual Data Entry
Pre-configured Lists for Lab Results make manual entry of lab data easy and efficient.
In this article you will learn:
STEP-BY-STEP: How to Setup Manual Entry Profiles
-
Click the Health Settings icon (gear icon).
-
Click the Manual Entry Profiles link.
-
Select a Lab from the drop-down list.
-
Enter a Configuration Name.
-
[Optional] Enter a Description of the list.
-
Select "Save" to create the list.
-
Highlight the new list by clicking on the list name in the left-side menu (list will highlight in blue).
-
Click the "Edit Details" button.
-
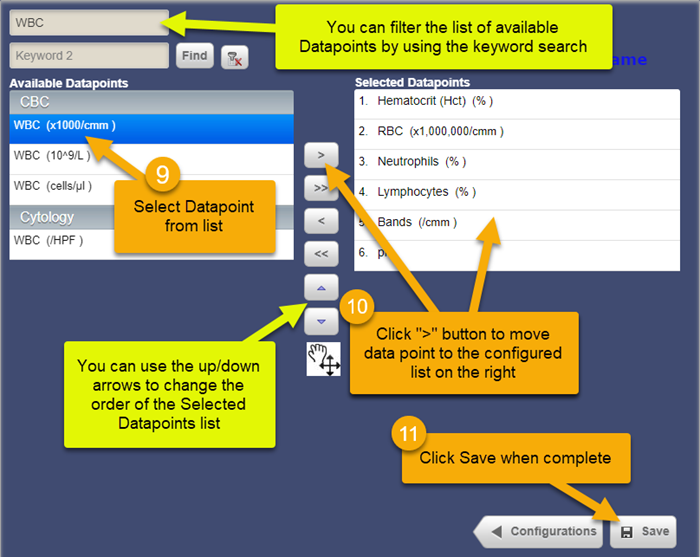
Select (highlight) each item from the list on the left.
TIP: You can search the datapoint list on the left by using the Keyword filters. This can save time when searching for specific items.
-
Click the > button to move the highlighted item to the Selected Datapoints list on the right.
NOTE: You can change the order of the data points by selecting an item from the Selected Datapoints list and then using the up/down arrow to change the order.
-
Once all datapoints are selected and ordered as preferred, select "Save" to save the list details.
-
Exit/Close the dialogue when finished.
STEP-BY-STEP: How to Use Manual Entry Profiles for Manual Lab Results Entry
-
Click the "Lab Results" button from within the Health Module.
-
Select (highlight) the sample for which you are entering results from the sample list.
-
Click the "Enter/Edit" button.
-
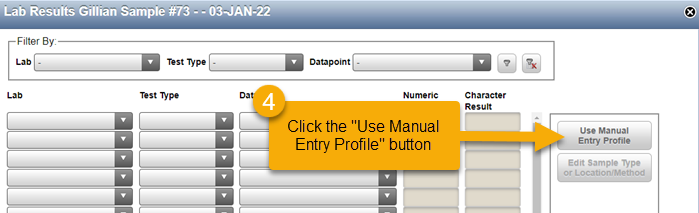
Click the "Use Manual Entry Profile" button.
-
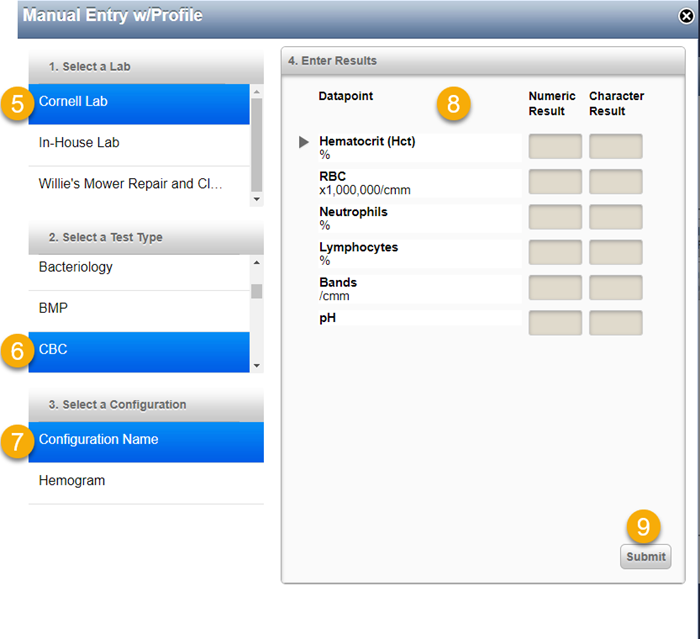
Select a Lab.
-
Select a Test Type.
-
Select a Configuration list.
-
Enter results.
-
Click the Submit button.
Comments
0 comments
Please sign in to leave a comment.